Moving to a new home means a new chance to up your surround sound system and other audio-visual (AV) wiring. If you’re low on outlets, you could run these cables under a carpet or leave them exposed, but for a finished-looking setup, it’s best to run the wiring inside of a wall.
Fortunately, you're not the only person to have this challenge. There are two tools that will help you accomplish this task: a flexible auger and fish rods. One of the more common applications where you'll need to run wiring in a wall is to hang surround sound speakers. In this example, we'll be talking about running the cable from the wall into the attic to appropriately connect everything.
Safety First
Running low-voltage cable like those used to power speakers or coaxial cable is generally safe, but there are potential dangers in the process. If you believe there may be existing electrical wiring in the wall in question, take care not to use sharp objects or force the auger/fish rod past them. If you encounter obstacles you’re unsure of, call a professional electrician.
Besides using a stud finder with a wire warning feature to help check for existing wiring, check the space above where you plan to run lines in the attic. There may be a hole already there that you can use.
Although this article strives to be accurate and introduce you to these tools and concepts, it certainly doesn't cover all possibilities. Please research your individual situation, check local codes and hire a qualified electrician if you're unsure of how to proceed.
Installation: The Easy Way
First, consider how your house is framed. This often involves two-by-four lengths of lumber placed vertically and spaced 14½ inches from each other. If you're lucky, this means that just inside the wall, there is either an empty space or insulation that you can feed wiring through. Assuming a hole isn’t there already, you'll need to drill a hole through the wood on top of the wall (top plate) to get into the area directly above where you'd like to run your cable. You can poke a hole with a thin rod into the ceiling to mark the position if necessary.
You can find the approximate center of this open space with a stud finder. Drilling down can be difficult in a cramped space, and if it's too tight to drill down inside the attic, try the alternative method in the next section.
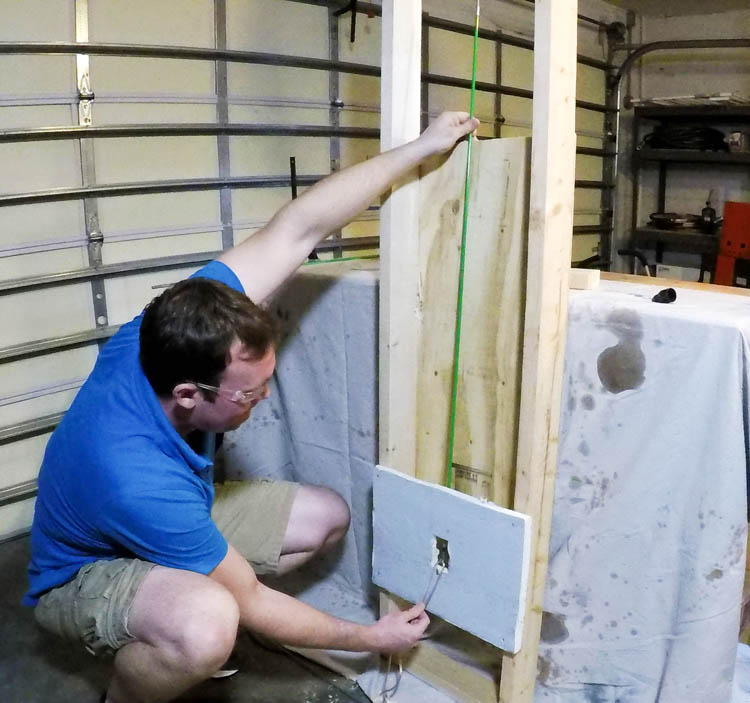
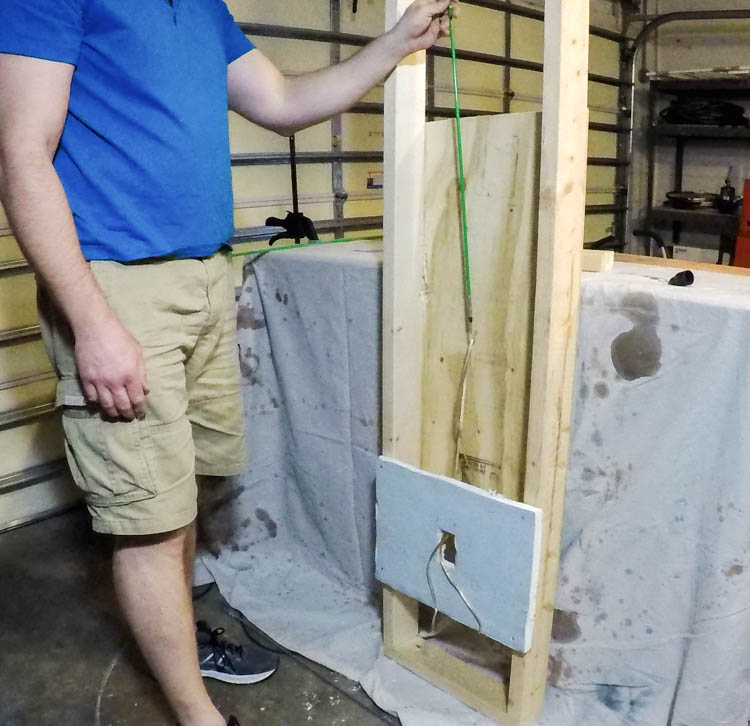
Once you get the hole drilled, insert a flexible fish rod into it with a pull cord or even a wire attached, then feed it to the rectangular hole for the wall plate that you'll be using for your speaker wires. You can then attach wiring to this pull cable, and move it up through the wall. Alternatively, you can put a hook on your fish rod and attach the cable to it directly, though you’ll need to make sure it doesn’t catch on anything. You can also tape the hook to help it through.
A simplified version of this procedure is shown below:


Installation: The Hard Way
Unfortunately, not all walls are created equal—or open. Some have "blocking" pieces of wood stuck between these two vertical frame members. While they’re useful for other purposes, you'll have to somehow get through them to run your wiring. You can determine if you have “a case of the blocks” by finding the vertical beams with a stud finder, then running it up and down between them to see if it reads anything.
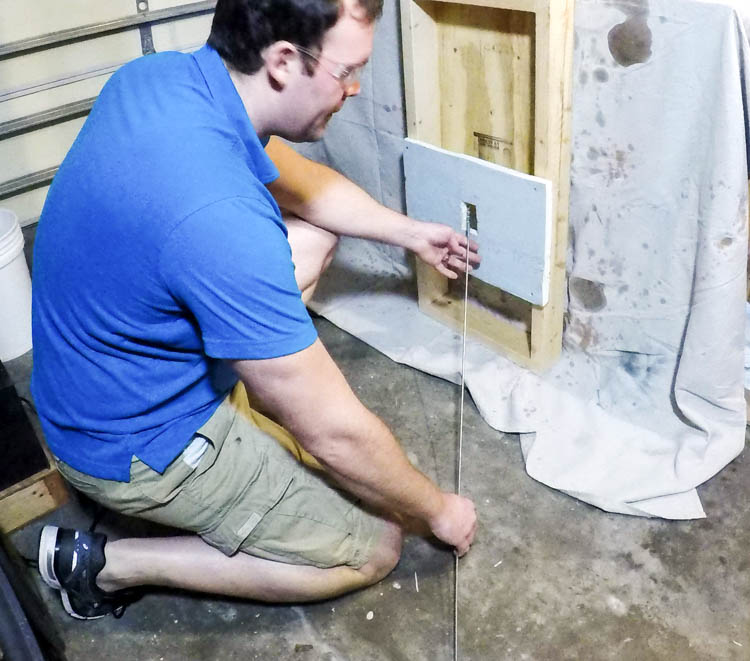
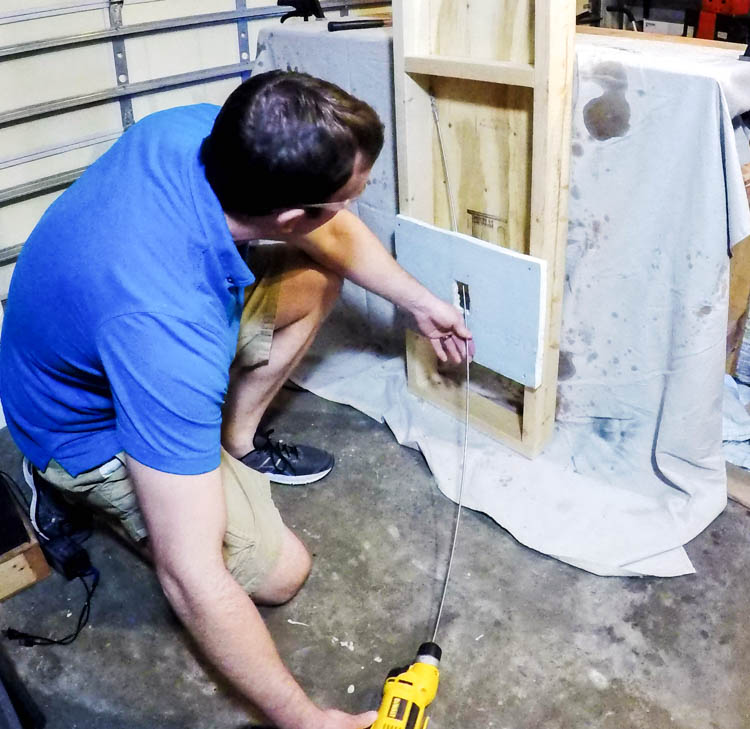
Though a little more difficult, you can get around this challenge using a flexible auger bit. This is fed inside of a wall, then twisted by a drill at a distance, cutting a hole inside that you can feed wires through.
As shown in the simplified "see-through" setup below, you should feed the bit in in such a way that it rests in or near the corner of the wall internals. To help get things lined up, you can use a flexible bit placement tool (not shown in the photos), which acts as a sort of handle to help you line up the bit inside the wall. Once you’re resting on this corner and manipulated into a vertical position so as not to drill into the vertical stud, engage the drill and punch through.
From there, using an extension for the flexible bit, you can keep drilling into the top plate in the ceiling, and punch a hole into the attic. If you are going to drill into the attic, you will probably want to mark the approximate length of the flexible bit so you don't drill through the roof in tight situations. Once you’re in the attic space, if your flexible auger bit has a hole in it, you can attach a pull cord—or any small cord—to it. As you pull it out, you'll be left with an easy way to pull your wire through.


Another Use for the Flexible Auger Bit
Even if you don't have a block in the middle of your wall, in some situations (like the low attic mentioned earlier) a flexible auger can be useful to drill through the top header. Just feed it through in the same way as if there was a block and drill through the top plate.
Once you have your hole drilled and wires pulled into the attic, it's simply a matter of running the wires through the other end to where speakers will be mounted in a ceiling, then hooking things up to a wall faceplate. Just remember to leave enough slack in the wiring to allow the wires to reach their destination.
Soon that surround sound system that you were so sad to disconnect at your old house will be functioning perfectly again, piping sound effects and music in front and back of you without visible wires!
Jeremy Cook is an engineer who writes about home technology. He provides tips and tricks on buying and installing coax cable, among other topics. To find a selection of Home Depot coaxial cable, click here.